Bye-Bye Smoke Odor: Expert Tips to Freshen Up Your Carpet!

Smoke odors can cling stubbornly to your carpet, whether it’s from cigarettes, a fireplace, or an accidental fire. The smell doesn’t just sit on the surface; it seeps into the fibers, making it difficult to eliminate. However, with the right techniques and tools, you can effectively freshen up your carpet and restore a clean, odor-free atmosphere in your home.

Why Smoke Smells Linger in Carpets

Smoke particles are incredibly small and can embed themselves deep into carpet fibers. Additionally, the sticky nature of tar from cigarette smoke makes it cling to surfaces for longer. If left untreated, the odor can worsen over time and even spread to other areas of your home.

Regular carpet cleaning combined with targeted odor removal methods is essential to eliminate the smoke smell completely.

Tools and Materials You’ll Need

Before starting, gather these essential items:

  • Vacuum Cleaner: For removing surface dirt and debris.
  • Baking Soda: A natural odor neutralizer.
  • White Vinegar: Known for its odor-eliminating properties.
  • Hydrogen Peroxide: For deep odor removal.
  • Dish Soap: To tackle stubborn odors and residue.
  • Essential Oils (optional): For a pleasant, fresh scent.
  • Steam Cleaner: Optional but highly effective for deep cleaning.
  • Clean Towels or Cloths: For blotting and drying.
  • Soft-Bristle Brush: To work cleaning solutions into the carpet.

Step-by-Step Guide to Removing Smoke Smell from Carpets

1. Vacuum Thoroughly

  • Begin by vacuuming your carpet to remove loose dirt, ash, and debris. Pay extra attention to high-traffic areas where smoke particles may have settled deeply.
  • Use a vacuum cleaner with a HEPA filter for better efficiency in trapping fine particles.

2. Apply Baking Soda

  • Sprinkle baking soda generously over the entire carpet. Baking soda is excellent for absorbing odors and neutralizing smoke smell.
  • Let the baking soda sit for at least 30 minutes, but for stronger odors, leave it overnight.
  • Vacuum the carpet thoroughly to remove the baking soda.

3. Create a Vinegar Solution

  • Mix equal parts white vinegar and warm water in a spray bottle. For an extra boost, add a few drops of essential oil, like lavender or eucalyptus.
  • Lightly spray the solution over the carpet, ensuring it’s damp but not soaking wet. Avoid over-saturating the carpet, as this can lead to mold growth.
  • Let the vinegar solution sit for 10-15 minutes to neutralize the smoke odor.

4. Blot and Rinse

  • Use a clean towel or cloth to blot the carpet and absorb excess moisture.
  • Dampen another cloth with plain water and blot the area again to rinse out the vinegar solution.

5. Steam Clean for Deep Odor Removal

  • If the smoke odor persists, use a steam cleaner for a deeper clean. Steam cleaning not only removes odors but also kills bacteria and allergens trapped in the carpet fibers.
  • Follow the manufacturer’s instructions to avoid damaging your carpet. Use a cleaning solution recommended for your steam cleaner for best results.

Removing Smoke Smell from Area Rugs

For area rugs, follow these additional tips:

  • Take the rug outside and shake it thoroughly to remove loose particles.
  • Hang the rug outdoors in direct sunlight. Sunlight helps eliminate odors naturally.
  • Sprinkle baking soda on both sides of the rug before vacuuming for a more thorough clean.

Professional Help for Stubborn Odors

If the smoke odor persists despite your best efforts, it may be time to call in Carpet And Rug Cleaning Specialists in Sydney. Professionals use advanced equipment and odor-neutralizing treatments to tackle even the most stubborn smells, leaving your carpets fresh and clean.

Tips to Prevent Smoke Smell from Returning

  • Use Air Purifiers: Invest in a good-quality air purifier to remove smoke particles from the air before they settle into the carpet.
  • Ventilate Your Home: Open windows and doors to improve airflow and reduce smoke buildup.
  • Enforce No-Smoking Zones: Restrict smoking to outdoor areas to prevent smoke odors from clinging to indoor surfaces.
  • Schedule Regular Cleanings: Routine carpet cleaning helps keep your carpet fresh and odor-free.

Conclusion

Eliminating smoke odor from your carpet may seem challenging, but with the right techniques and tools, you can achieve a clean and fresh-smelling home. From vacuuming and using natural solutions like vinegar and baking soda to professional services like Carpet And Rug Cleaning Specialists in Sydney, there’s a solution for every level of odor. Regular cleaning and preventive measures will ensure your carpets stay odor-free and maintain their beauty for years to come.

Published on: February 15, 2025

Freshen Up Your Sofa: 5 Simple Steps to Banish Odours!

Your sofa is the centerpiece of your living space, offering comfort and style. However, over time, it can absorb a variety of odors from pets, spills, and daily use. A smelly sofa not only affects the ambiance of your home but can also make sitting on it unpleasant. Fortunately, refreshing your sofa doesn’t have to be a daunting task. In this guide, we’ll explore five simple steps to banish odors and keep your sofa smelling fresh, complementing your regular upholstery cleaning routine.

Why Does Your Sofa Smell?

Odors in your sofa can come from:

  • Spills and food particles: Liquids and crumbs can seep into the fabric and cushions, leading to unpleasant smells.
  • Pets: Pet hair, dander, and accidents can leave lingering odors.
  • Humidity: Moisture can encourage the growth of mold or mildew, creating a musty smell.
  • Daily use: Sweat, oils, and dirt accumulate over time, contributing to unpleasant odors.

Addressing these causes regularly can prevent odors from becoming permanent.

Step 1: Vacuum Thoroughly

The first step to banishing odors is to remove surface dirt and debris.

  • Use a vacuum cleaner with an upholstery attachment.
  • Focus on seams, crevices, and under cushions where crumbs and dust tend to accumulate.
  • Regular vacuuming helps prevent dirt from embedding deeper into the fabric, which can lead to smells.

Step 2: Deodorize with Baking Soda

Baking soda is a natural deodorizer that neutralizes odors effectively.

  • Sprinkle a generous amount of baking soda evenly over the sofa.
  • Let it sit for 15–30 minutes to absorb odors. For stronger smells, leave it overnight.
  • Vacuum the baking soda thoroughly to remove it, taking care to get into all the nooks and crannies.

Step 3: Spot Clean Stains

Spills and stains can trap odors, so it’s important to address them promptly.

  • Mix a solution of warm water and mild dish soap.
  • Dampen a clean microfiber cloth with the solution and gently blot the stained areas. Avoid rubbing, as this can push the stain deeper into the fabric.
  • Rinse with a damp cloth and blot dry with a clean towel.

For delicate or stubborn stains, consider Commercial Upholstery Cleaning Services in Sydney for professional stain and odor removal.

Step 4: Use Vinegar for Deep Odors

White vinegar is a powerful natural deodorizer that eliminates tough smells.

  • Mix equal parts white vinegar and water in a spray bottle.
  • Lightly mist the sofa, focusing on areas with strong odors. Avoid soaking the fabric.
  • Allow the vinegar to air dry. The vinegar smell will dissipate, leaving your sofa fresher.

Step 5: Let Fresh Air Work Its Magic

Proper ventilation helps eliminate lingering smells:

  • Open windows or use fans to increase airflow in the room.
  • If possible, move your sofa to an open area, like a balcony or patio, for fresh air exposure.
  • Sunlight can also help kill bacteria and mold, but avoid prolonged exposure to prevent fabric fading.

Bonus Tips for Maintaining a Fresh-Smelling Sofa

  1. Vacuum Regularly
    Incorporate vacuuming into your weekly cleaning routine to prevent odor buildup.
  2. Use Sofa Covers
    Washable covers or throws can protect your sofa from spills, pet hair, and daily wear.
  3. Address Spills Immediately
    Blot spills as soon as they occur to prevent them from seeping into the fabric and cushions.
  4. Invest in Fabric Protectors
    Fabric protectors create a barrier against stains and odors, making cleanup easier.
  5. Rotate Cushions
    Flipping and rotating cushions ensures even wear and reduces the risk of odor accumulation.

Common Mistakes to Avoid

  1. Using Harsh Chemicals
    Avoid using bleach or harsh cleaning agents, as they can damage fabric and leave behind strong chemical odors.
  2. Over-Saturating the Fabric
    Excessive moisture can lead to mold or mildew growth, worsening the odor problem.
  3. Ignoring Stains
    Even small stains can trap odors if left untreated, so address them promptly.
  4. Neglecting Professional Cleaning
    DIY methods are effective for maintenance, but professional cleaning ensures a deeper clean and long-lasting freshness.

Contact Us

Need expert help to refresh your sofa? Our professional upholstery cleaning services ensure your furniture stays clean, fresh, and inviting. Contact us today for tailored solutions to your cleaning needs!

Conclusion

A fresh-smelling sofa is essential for a comfortable and welcoming home. By following these simple steps and incorporating regular maintenance, you can banish odors and extend the life of your furniture. For persistent smells or professional care, don’t hesitate to reach out to upholstery cleaning experts.

Start your sofa deodorizing routine today and enjoy a cleaner, fresher living space!

FAQs

Q1. How often should I deodorize my sofa?

Deodorize your sofa every 2–3 months or as needed to maintain freshness.

Q2. Can I use essential oils to deodorize my sofa?

Yes, a few drops of essential oil mixed with water can be sprayed lightly on your sofa for a pleasant scent. Test on a hidden area first.

Q3. What’s the best way to prevent pet odors on my sofa?

Use washable sofa covers, vacuum regularly, and consider professional cleaning for deep pet odor removal.

Q4. Should I hire professionals if DIY methods don’t work?

Yes, professional services can tackle tough odors and stains that DIY methods may not completely remove.

Published on: February 13, 2025

Thermal Curtain Care: Easy At-Home Cleaning Tips for Cozy Perfection!

Thermal curtains are a fantastic addition to any home. Not only do they enhance privacy and block out light, but they also regulate indoor temperatures by insulating against the heat of summer and the chill of winter. However, like all curtains, they collect dust, allergens, and stains over time, making regular cleaning essential to maintain their functionality and appearance.

Cleaning thermal curtains at home can seem daunting, but with the right approach, it’s both manageable and effective. This guide provides easy-to-follow tips to keep your thermal curtains fresh, clean, and long-lasting.

Why Regular Cleaning Matters for Thermal Curtains

Thermal curtains are designed with a specialized backing that enhances their insulation properties. This layer requires gentle handling to avoid damage. Regular cleaning not only preserves their insulating abilities but also:

  • Improves Air Quality: Removes dust, allergens, and pollutants that accumulate on the fabric.
  • Extends Longevity: Prevents the breakdown of fabric fibers and the thermal backing.
  • Enhances Appearance: Keeps curtains looking neat and fresh, complementing your home decor.

How Often Should You Clean Thermal Curtains?

The frequency of cleaning depends on the environment and usage:

  • Weekly: Light dusting or vacuuming to prevent buildup.
  • Quarterly: Spot cleaning for minor stains and dirt.
  • Annually: A thorough wash or deep clean to maintain freshness and insulation.

Step-by-Step Guide to Cleaning Thermal Curtains at Home

1. Dust and Vacuum Regularly

Thermal curtains attract dust, which can diminish their appearance and affect air quality. Regular dusting keeps them looking fresh and prevents deep-set dirt.

  • How to Do It:
    1. Fully close the curtains to expose a flat surface.
    2. Use a vacuum cleaner with a brush attachment to gently remove dust and debris.
    3. Work from the top to the bottom of the curtains, covering both the front and back sides.
  • Pro Tip: For added freshness, use a lint roller to remove stubborn dust or pet hair.

2. Spot Clean Minor Stains

Spills and smudges can occur, but prompt spot cleaning can prevent stains from becoming permanent.

  • How to Spot Clean:
    1. Mix a small amount of mild detergent with warm water.
    2. Dip a clean, soft cloth or sponge into the solution and wring out excess liquid.
    3. Gently dab the stained area, avoiding rubbing to protect the thermal backing.
    4. Wipe with a damp cloth to remove soap residue, then let the curtain air dry.
  • Pro Tip: Always test the cleaning solution on a hidden area to ensure it doesn’t discolor or damage the fabric.

3. Hand Wash for a Gentle Clean

If your thermal curtains need a deeper clean, hand washing is the safest method to protect the fabric and thermal layer.

  • How to Hand Wash:
    1. Remove the curtains from their rods and shake off loose dust.
    2. Fill a large basin or bathtub with lukewarm water and a mild detergent.
    3. Submerge the curtains and gently agitate them with your hands.
    4. Rinse thoroughly with clean water to remove all soap residue.
    5. Press out excess water without wringing the fabric to avoid creases or damage.
  • Pro Tip: Avoid soaking the thermal backing for too long, as it can weaken or peel.

4. Machine Wash with Care

Some thermal curtains are machine washable. Check the care label before proceeding.

  • How to Machine Wash:
    1. Use a gentle cycle with cold or lukewarm water and a mild detergent.
    2. Wash the curtains separately to prevent tangling or stretching.
    3. Avoid using bleach or fabric softeners, which can harm the thermal layer.
  • Pro Tip: Place the curtains in a mesh laundry bag for added protection during the wash.

5. Drying Thermal Curtains

Proper drying is crucial to maintain the structure and insulation of thermal curtains.

  • How to Dry:
    1. Lay the curtains flat on a clean towel to air dry, keeping them away from direct sunlight or heat sources.
    2. If using a dryer, select a no-heat or air-dry setting to avoid damaging the thermal backing.
  • Pro Tip: Rehang the curtains while slightly damp to reduce wrinkles and ensure they dry evenly.

When to Seek Professional Help

For heavily soiled curtains or delicate fabrics, professional Curtain Cleaning services are a smart choice. Professionals understand the nuances of thermal curtain care and can ensure a thorough, damage-free clean. If you’re searching for trusted services, look for local curtain cleaners near Sydney to handle the job with expertise.

Tips to Maintain Thermal Curtains

  1. Avoid Harsh Chemicals: Always use mild detergents and avoid bleach or abrasive cleaners.
  2. Protect from Sunlight: Prolonged exposure to direct sunlight can weaken the fabric and fade colors. Use blinds or liners for added protection.
  3. Regular Maintenance: Dust and vacuum your curtains weekly to reduce the need for frequent deep cleaning.
  4. Handle with Care: When opening or closing your curtains, avoid excessive pulling to prevent wear on the fabric and backing.

Benefits of Clean Thermal Curtains

  1. Enhanced Insulation: Clean curtains perform better at regulating indoor temperatures, reducing energy costs.
  2. Improved Air Quality: Regular cleaning eliminates dust and allergens, creating a healthier living space.
  3. Prolonged Lifespan: Proper maintenance prevents premature wear, ensuring your curtains remain functional and beautiful for years.
  4. Aesthetic Appeal: Fresh curtains elevate the overall look of your room, making your home feel cozier and more inviting.

Conclusion

Thermal curtains are a practical and stylish investment for any home, but they require proper care to maintain their functionality and appearance. By incorporating regular dusting, spot cleaning, and gentle washing into your routine, you can keep your curtains in excellent condition. For more intensive cleaning, professional Curtain Cleaning services provide the expertise needed to handle delicate fabrics and thermal backings.

With these tips, your thermal curtains will remain cozy, clean, and a centerpiece of your home’s decor for years to come.

Published on: February 12, 2025

Choosing the Best: Key Factors to Consider When Hiring a Water Damage Restoration Company

Water damage can strike unexpectedly, causing significant stress and potential harm to your property. Choosing the right Water Damage Restoration company is critical to ensuring your home is restored quickly, efficiently, and safely. With many options available, knowing what to look for can save you time, money, and future headaches.

Why Hiring the Right Restoration Company Matters

A professional Damage Restoration company does more than clean up the mess. They address hidden moisture, prevent mold growth, and restore your property to its original condition. Choosing an experienced and reliable service provider ensures the job is done thoroughly and prevents long-term issues.

Key Factors to Consider When Hiring a Damage Restoration Company

1. Experience and Expertise

Look for a company with years of experience in the field. A seasoned team will have the skills and knowledge to handle various types of water damage, from minor leaks to major flooding incidents. Ask about their expertise in handling different categories of water damage, such as clean water, gray water, or black water.

2. Licensing and Certification

Verify that the company is licensed and certified by reputable organizations like the Institute of Inspection Cleaning and Restoration Certification (IICRC). This certification ensures they follow industry standards and use best practices for restoration work.

3. Availability and Response Time

Water damage requires immediate attention to minimize further harm. Choose a company that offers 24/7 emergency services and can respond quickly to your call. A fast response can prevent additional damage and reduce restoration costs.

4. Comprehensive Services

The best restoration companies provide a full range of services, including:

  • Water extraction
  • Drying and dehumidification
  • Mold remediation
  • Structural repairs
  • Cleaning and sanitization

This ensures that all aspects of the restoration process are handled seamlessly.

5. Insurance and Claims Assistance

Dealing with insurance can be a hassle during an already stressful time. Look for a company that works directly with insurance providers and can assist you in filing claims. Their experience can help ensure you receive proper coverage for the restoration work.

6. Reputation and Reviews

Check online reviews, testimonials, and ratings to gauge the company’s reputation. Platforms like Google, Yelp, and the Better Business Bureau are great places to start. Positive feedback from past customers is a good indicator of reliable service.

7. Transparent Pricing

Choose a company that provides clear and upfront pricing. They should offer a detailed estimate before starting work, with no hidden fees or surprises. This transparency helps build trust and ensures you stay within budget.

8. Advanced Equipment and Techniques

A professional restoration company should use state-of-the-art equipment, such as industrial-grade pumps, dehumidifiers, and moisture meters. Advanced tools and techniques ensure thorough and efficient damage restoration of water.

9. Customer Support and Communication

Good communication is essential during the restoration process. Choose a company that keeps you informed at every step and answers your questions promptly. Exceptional customer service can make a challenging situation more manageable.

Contact Us

If your home has suffered water damage, don’t wait to take action. Our experienced team specializes in Water Damage Restoration in Sydney to ensure your property is restored quickly and safely. Contact us today for a consultation and let us help you get your home back to normal.

Conclusion

Choosing the right Damage Restoration company is vital for protecting your home and peace of mind. By considering factors like experience, certification, response time, and reputation, you can ensure that your property is in good hands. Remember, quick action is crucial—don’t delay in contacting a trusted restoration service. Protect your home today and start the journey to recovery!

FAQs About Hiring a Water Damage Restoration Company

Q1: How soon should I contact a restoration company after water damage?

Contact a Damage Restoration company immediately. Quick action minimizes damage, prevents mold growth, and reduces costs.

Q2: Can I handle damage restoration of water by myself?

Small leaks may be manageable, but extensive water damage requires professional expertise to address hidden moisture and contamination effectively.

Q3: How do I know if a company is certified?

Ask for proof of certifications, such as IICRC accreditation, and verify them through the certifying body’s website.

Q4: What questions should I ask a restoration company before hiring?

Ask about their experience, certifications, response time, services offered, and whether they work with insurance providers.

Q5: Is damage restoration covered by insurance?

Most homeowner’s insurance policies cover water damage caused by sudden events like pipe bursts or storms. Check your policy and consult your restoration company for assistance with claims.

Published on: February 11, 2025

Beauty Blunders? Easy Ways to Remove Makeup Stains from Mattresses and Bedding

We’ve all been there—accidentally falling asleep with makeup on or dropping a makeup product on the bed. These beauty mishaps can leave stubborn stains on your mattress and bedding, making it challenging to restore their original look. From foundation to mascara, makeup stains are no match for the right cleaning techniques. This guide will show you how to tackle those pesky stains effectively and maintain a clean, fresh sleeping environment.

Why Mattress Cleaning Matters

Makeup stains not only impact the appearance of your mattress and bedding but can also lead to lingering odors and hygiene issues if left untreated. Regular mattress cleaning helps eliminate stains, prevents the buildup of dirt and bacteria, and extends the life of your bedding and mattress. Acting quickly is key to keeping your sleep space fresh and stain-free.

Common Makeup Stains and Why They’re Tricky

Makeup products are designed to be long-lasting, which makes removing their stains particularly challenging. Here’s a breakdown of common culprits:

  • Foundation: Oil-based foundations are tough to lift due to their grease content.
  • Lipstick: The combination of pigments and oils makes lipstick stains hard to remove.
  • Mascara/Eyeliner: Waterproof formulas are particularly stubborn.
  • Powders: Loose powders may seem easier, but they can embed into fabrics.

Step-by-Step Guide to Remove Makeup Stains

1. Blot the Stain Immediately

Quick action prevents makeup stains from setting:

  • Use a clean white cloth or paper towel to blot the stain gently.
  • Avoid rubbing, as this can push the makeup deeper into the fabric.

2. Use a Mild Detergent Solution

For general makeup stains, a mild detergent can work wonders:

  • Mix a few drops of dish soap or laundry detergent with warm water.
  • Dip a clean cloth into the solution and dab it onto the stain.
  • Let it sit for a few minutes to break down the oils and pigments.

3. Tackle Oil-Based Stains with Rubbing Alcohol

Rubbing alcohol is excellent for dissolving oil-based stains like foundation and lipstick:

  • Dampen a cotton ball or clean cloth with rubbing alcohol.
  • Dab it onto the stain, starting from the edges and working inward.
  • Blot with a clean cloth to lift the stain.

4. Use Baking Soda for Deodorizing

If the stain leaves behind an odor:

  • Sprinkle baking soda generously over the affected area.
  • Let it sit for a few hours to absorb moisture and odors.
  • Vacuum thoroughly to remove the baking soda residue.

5. Try Makeup Remover

Makeup remover isn’t just for your face—it can also work on stains:

  • Choose an oil-free makeup remover for best results.
  • Apply a small amount to a clean cloth and dab it onto the stain.
  • Rinse the area with a damp cloth to remove any residue.

6. Tackle Waterproof Products with Hydrogen Peroxide

For stubborn waterproof makeup like mascara and eyeliner:

  • Mix one part hydrogen peroxide with two parts water.
  • Apply the solution to the stain with a clean cloth or sponge.
  • Let it sit for 5–10 minutes, then blot gently.

Removing Makeup Stains from Bedding

Bedding is easier to clean since it’s machine washable. Here’s how to handle makeup-stained sheets and pillowcases:

  • Pre-Treat the Stain: Apply a stain remover or mild detergent directly to the stain.
  • Soak in Cold Water: Soak the fabric in cold water for 15–30 minutes to loosen the stain.
  • Wash on the Gentle Cycle: Use cold water and a mild detergent to prevent setting the stain.
  • Avoid Heat: Air dry or tumble dry on low to avoid setting any remaining stain.

Preventing Future Makeup Stains

Prevention is always better than cleanup. Here are some tips to avoid makeup stains:

  • Remove Makeup Before Bed: Use a makeup remover or cleansing wipes before lying down.
  • Use Protective Covers: Mattress protectors and pillowcase liners add a barrier against stains.
  • Be Cautious During Application: Avoid applying makeup near your bedding.
  • Clean Bedding Regularly: Wash sheets and pillowcases weekly to maintain hygiene.

When to Call Professionals

If a makeup stain is too stubborn to handle or has been left untreated for too long, it may be time to contact the Best Local Mattress Cleaning Services. Professionals use advanced techniques to remove even the toughest stains while protecting the integrity of your mattress.

Regular Mattress Cleaning for Long-Term Care

In addition to removing stains, regular cleaning ensures a hygienic and comfortable sleep environment:

  • Vacuum Regularly: Keep dust and allergens at bay with routine vacuuming.
  • Spot Clean Spills Immediately: Address any spills or stains as soon as they occur.
  • Air Out Your Mattress: Allow your mattress to breathe in a well-ventilated room.

Conclusion

Makeup stains on your mattress and bedding may seem daunting, but with the right approach, you can restore their cleanliness and freshness. Acting quickly, using effective cleaning methods, and adopting preventive measures can save you time and effort in the long run. Regular cleaning will keep your sleep environment spotless and hygienic. For persistent stains or professional-grade care, don’t hesitate to call the Best Local Mattress Cleaning Services for expert help.

Published on: February 10, 2025

Smooth It Out: Easy Tricks to Flatten Your Rug and Remove Creases

Rugs can add warmth and elegance to any space, but creases, bumps, and curling edges can ruin the aesthetic and even create safety hazards. Whether your rug has just been unrolled or has developed wrinkles over time, it’s essential to flatten it properly to restore its beauty and functionality.

Fortunately, there are simple and effective ways to remove creases and flatten your rug, ensuring it lays perfectly flat on your floor. This guide will walk you through expert-approved techniques to smooth out your rug and keep it looking flawless.

1. Reverse Roll the Rug

One of the quickest ways to tackle a wrinkled rug is by reversing the roll. This method works especially well for new rugs that have just been unrolled and haven’t had time to settle.

How to Reverse Roll a Rug:

  1. Roll the rug in the opposite direction of the creases.
  2. Secure the rolled-up rug with ties or a light rope.
  3. Leave it in this position for a few hours or overnight.
  4. Unroll the rug and lay it flat.

Pro Tip: Place the rug on a clean, hard surface when unrolling to avoid dirt or debris sticking to the backing.

2. Use Heavy Furniture to Weigh It Down

If your rug has stubborn curls or edges that won’t stay flat, strategically placing heavy furniture can help.

Steps to Flatten with Furniture:

  1. Lay the rug flat in its intended position.
  2. Place heavy items like tables, chairs, or books on the curled or wrinkled areas.
  3. Leave the weights in place for 24-48 hours to allow the rug to relax.

Pro Tip: Use a barrier, like a cloth or piece of cardboard, between the rug and the heavy items to prevent damage to the fibers.

3. Apply Heat to Relax the Fibers

Heat can help loosen the rug’s fibers, making it easier to flatten out creases and bumps. However, you must be cautious not to overheat or damage the material.

How to Use Heat Safely:

  • Ironing: Place a damp cloth or towel over the wrinkled area and use a low-heat iron to gently press out the creases. Move the iron in a circular motion and avoid direct contact with the rug.
  • Hair Dryer: Use a hair dryer on a low to medium setting. Hold it a few inches above the rug and focus on the creased areas, smoothing them out with your hands or a brush as you go.

Pro Tip: Avoid applying heat to delicate rugs like wool, silk, or antique pieces.

4. Steam Your Rug for Quick Results

Steam cleaning is another effective way to remove creases, as it relaxes the fibers and helps the rug lay flat.

How to Steam a Rug:

  1. Use a handheld steamer or a steam cleaner.
  2. Hold the steamer a few inches above the rug and move it back and forth over the wrinkled areas.
  3. Smooth the rug with your hands or a soft brush while steaming.

Pro Tip: Steaming not only flattens the rug but also refreshes its appearance. If you don’t own a steamer, search for cheap rug cleaning to find professional services that can assist.

5. Roll and Rest

For rugs that are too large or cumbersome to manipulate, rolling and resting them is a simple yet effective solution.

How to Roll and Rest:

  1. Roll the rug tightly from one end to the other.
  2. Secure it with ties or straps.
  3. Leave it rolled up for 24-48 hours.
  4. Unroll and lay it flat, smoothing out any remaining creases by hand.

6. Let Time Work Its Magic

Sometimes, all your rug needs is a bit of time to adjust to its new environment. If the rug is in a low-traffic area, leave it flat and give it a few days to naturally settle.

Pro Tip: Ensure the rug is placed on a clean, flat surface to encourage even settling.

7. Use a Rug Pad for Long-Term Maintenance

A high-quality rug pad can do more than prevent slipping—it also helps keep your rug flat and prevents creases from forming.

Benefits of a Rug Pad:

  • Adds cushioning for extra comfort.
  • Protects the rug from friction and wear.
  • Keeps the rug securely in place, reducing the chances of curling or bunching.

Pro Tip: Choose a rug pad that’s compatible with your flooring type to avoid any damage.

8. Avoid Common Mistakes

Don’t Ignore Creases:

Leaving creases unattended can cause permanent damage to your rug over time.

Avoid Excessive Moisture:

Using too much water or steam can lead to mold or mildew growth, especially in humid environments.

Don’t Use High Heat:

Excessive heat can damage delicate rug fibers, causing discoloration or shrinking.

Conclusion

Flattening a wrinkled rug doesn’t have to be a complicated task. With simple techniques like reverse rolling, applying heat, or using heavy furniture, you can easily restore your rug to its original shape. Regular maintenance, such as vacuuming and using a rug pad, will help prevent creases from forming in the future.

For delicate rugs or particularly stubborn creases, professional rug cleaning and steaming services can provide expert solutions. Search for cheap rug cleaning near me to find reliable and affordable help in your area. With these tips, your rug will remain a flawless and functional part of your home décor.

Published on: February 8, 2025

Quarry Tile Care Made Easy: 4 Effective Ways to Keep Them Spotless!

Quarry tiles are a durable and timeless choice for both indoor and outdoor spaces. However, their unglazed and porous nature makes them prone to dirt, stains, and grime buildup. Proper Tile Cleaning is essential to keep quarry tiles looking fresh and well-maintained. 

Why Quarry Tile Cleaning Is Important

Quarry tiles are known for their durability and rustic charm, but without regular cleaning, they can lose their appeal. The tiles are often used in high-traffic areas like kitchens, patios, and hallways, making them susceptible to dirt accumulation. Regular maintenance not only enhances their aesthetic but also prolongs their lifespan.

Tools and Materials You’ll Need

Before you start cleaning your quarry tiles, gather the following items:

  • Broom or vacuum
  • Mop with a bucket of warm water
  • pH-neutral tile cleaner
  • Soft-bristle brush or sponge
  • Baking soda
  • White vinegar
  • Clean microfiber cloth or towels

4 Effective Ways to Clean Quarry Tiles

1. Sweep or Vacuum Regularly

The first step to maintaining quarry tiles is to remove loose dirt and debris that can scratch the surface.

  • Use a broom with soft bristles or a vacuum cleaner with a hard floor setting.
  • Focus on corners and grout lines where dirt tends to accumulate.

This quick routine prevents dust and debris from settling into the porous surface of the tiles.

2. Mop with Warm Water and a Neutral Cleaner

For everyday cleaning, warm water combined with a pH-neutral tile cleaner works best.

  • Mix the cleaner according to the manufacturer’s instructions in a bucket of warm water.
  • Dip a mop into the solution, wring out the excess water, and mop the floor in small sections.
  • Rinse the mop frequently to avoid spreading dirt across the tiles.

After mopping, allow the tiles to air dry or wipe them with a clean microfiber cloth.

3. Tackle Stains with Baking Soda Paste

For tough stains or grime on quarry tiles, a simple baking soda paste can do wonders.

  • Mix equal parts of baking soda and water to form a paste.
  • Apply the paste to the stained areas and let it sit for 10-15 minutes.
  • Gently scrub the area with a soft-bristle brush or sponge.
  • Rinse thoroughly with warm water and wipe dry with a clean cloth.

This method is especially useful for removing grease stains from kitchen quarry tiles.

4. Use Vinegar for Deep Cleaning

White vinegar is an effective natural cleaner for quarry tiles but should be used sparingly.

  • Mix one part white vinegar with three parts water in a spray bottle.
  • Spray the solution onto the tiles and let it sit for a few minutes.
  • Scrub gently with a brush to remove dirt and stains.
  • Rinse with warm water and dry the tiles thoroughly.

For routine cleaning, limit the use of vinegar to avoid over-acidifying the tiles, which can damage their finish over time.

Maintenance Tips for Quarry Tiles

  • Seal the Tiles: Apply a tile sealer every 6-12 months to protect the porous surface and make cleaning easier.
  • Avoid Harsh Chemicals: Stay away from bleach or acid-based cleaners, which can damage quarry tiles.
  • Clean Spills Immediately: Promptly clean spills, especially from oily or acidic substances, to prevent staining.
  • Consider Professional Help: If the tiles are heavily soiled or stained, look for Cheap Tile Cleaning Near Me to get expert assistance.

Common Mistakes to Avoid

  • Using Excess Water: Over-saturating quarry tiles can lead to water absorption and weaken their durability. Always wring out the mop before use.
  • Scrubbing with Hard Brushes: Avoid abrasive tools that can scratch the tiles and cause long-term damage.
  • Neglecting Grout Lines: Grout lines are prone to dirt buildup and require regular cleaning with a soft-bristle brush.

Benefits of Proper Quarry Tile Maintenance

  1. Enhanced Durability: Regular cleaning prevents wear and tear, ensuring your tiles last for years.
  2. Improved Appearance: Clean tiles contribute to a polished and inviting look.
  3. Hygienic Surfaces: Proper cleaning eliminates dirt, bacteria, and allergens.
  4. Cost Savings: Routine care minimizes the need for expensive repairs or replacements.

Conclusion

Quarry tiles add a rustic and durable charm to any space, but they require proper care to maintain their beauty and functionality. By following these four effective cleaning methods, you can easily keep your quarry tiles spotless and long-lasting. Incorporate regular Tile Cleaning into your routine, and don’t hesitate to seek professional help if needed. With consistent care, your quarry tiles will continue to enhance your space for years to come.

Published on: January 31, 2025

Carpet Patching: A Lifesaver for Pet Owners Dealing with Carpet Damage!

Pets bring joy and companionship to our homes, but they can also be tough on carpets. Scratches, stains, and accidental tears caused by claws, chewing, or pet accidents can make carpets look worn and damaged. Instead of replacing the entire carpet, carpet patching offers an effective and affordable solution for pet owners. It restores damaged areas while keeping the rest of the carpet intact.

Common Carpet Damages Caused by Pets

Pet owners often face carpet damage due to various reasons, including:

  • Scratching and Claw Marks – Cats and dogs may scratch carpets out of habit or to sharpen their claws, leading to frayed edges.
  • Chewing Damage – Puppies, in particular, may chew on carpet fibers, creating holes and uneven surfaces.
  • Stains and Odors – Pet accidents can leave behind stubborn stains and lingering smells that regular carpet cleaning may not always remove.
  • Loose or Torn Carpet Sections – Running and playing can cause carpets to shift, loosen, or even tear in certain spots.
  • Shedding and Dirt Accumulation – Fur, dirt, and pet dander can get trapped in carpet fibers, making them look dirty and worn.

How Carpet Patching Helps Pet Owners

Carpet patching is a cost-effective way to fix localized carpet damage without replacing the entire flooring. Here’s how it benefits pet owners:

1. Restores Carpet Appearance

Pet-related damage can make carpets look old and neglected. Carpet patching seamlessly repairs holes, scratches, and torn sections, restoring the carpet’s original look.

2. Saves Money on Full Replacement

Replacing a whole carpet can be expensive. Patching fixes only the damaged area, making it a budget-friendly option for pet owners.

3. Removes Stains That Won’t Come Out

If pet stains are deeply embedded in the carpet fibers and won’t go away with carpet cleaning, patching can remove the affected section and replace it with a fresh piece.

4. Prevents Further Damage

Minor damage, if ignored, can worsen over time. Carpet patching prevents further tearing or fraying, extending the lifespan of your carpet.

5. Blends Seamlessly with the Existing Carpet

Professionals match the patch with the surrounding carpet, ensuring the repair is nearly invisible. This is ideal for keeping your home looking neat and well-maintained.

The Carpet Patching Process

Professional carpet patching follows a precise method to ensure a seamless repair. Here’s how it’s done:

  1. Assess the Damage – The extent of damage is evaluated to determine if patching is the best solution.
  2. Find a Matching Patch – A matching carpet piece is used, either from leftover material or from a hidden area like inside a closet.
  3. Cut Out the Damaged Area – The damaged portion is carefully removed to create a clean patching space.
  4. Attach the Patch – The new carpet piece is fitted into the cut-out area using adhesive or heat-sealing methods.
  5. Blend the Fibers – The repaired section is blended into the surrounding carpet to ensure an even appearance.

When to Call a Professional

While small damages may be manageable with DIY fixes, larger or complex repairs require expert attention. If your carpet has multiple torn areas, deep stains, or requires Carpet Padding Replacement and Repair in Sydney, professional services can ensure a long-lasting fix.

Tips to Protect Carpets from Pet Damage

To reduce future carpet damage from pets, consider these preventive measures:

  • Trim Your Pet’s Nails Regularly – Shorter nails reduce the risk of scratches and snags.
  • Use Pet-Friendly Rugs or Mats – Placing rugs in high-traffic pet areas helps protect the carpet underneath.
  • Clean Pet Stains Immediately – Act quickly to remove accidents before they seep deep into the carpet fibers.
  • Provide Scratching Posts and Chew Toys – Giving pets their own play items can prevent them from damaging carpets.
  • Schedule Routine Carpet Maintenance – Regular carpet cleaning helps remove pet hair, dander, and odors, keeping carpets fresh.

Conclusion

For pet owners dealing with carpet damage, patching is an efficient and cost-effective solution. It restores damaged areas without replacing the entire carpet, saving time and money. By repairing scratches, stains, and tears, carpet patching helps maintain a clean and beautiful home while ensuring durability against future pet-related wear.

Published on: January 29, 2025

7 Genius Hacks to Keep Your Carpet Spotless and Stain-Free!

A clean carpet can transform your home, creating a fresh and inviting atmosphere. However, maintaining a spotless carpet requires regular care and smart strategies. In this article, we’ll share 7 effective tips for a stain-free carpet, including expert advice on carpet cleaning to keep your floors looking as good as new.

1. Act Quickly on Spills

The first rule of maintaining a stain-free carpet is to address spills immediately. Liquids and food stains can set into the fibers if left unattended. Use a clean cloth or paper towel to blot the stain gently—avoid rubbing as it spreads the stain further.

2. Use the Right Cleaning Solutions

Not all cleaning solutions are suitable for every carpet type. For minor stains, a mixture of water and mild dish soap works well. For tougher stains, use a carpet-safe cleaner. Test any solution on an inconspicuous area to ensure it won’t damage your carpet.

3. Vacuum Regularly

Vacuuming is essential for maintaining a clean carpet. Dust, dirt, and debris can accumulate and cause discoloration over time. Vacuum high-traffic areas at least twice a week to keep them looking pristine.

4. Employ Professional Carpet Cleaning Services

While regular maintenance is key, professional services can make a significant difference. Experts use advanced techniques like steam cleaning and deep extraction to remove stubborn dirt and allergens that regular vacuums can’t handle. Schedule professional cleaning at least once a year for best results.

5. Invest in Carpet Protectors

Protective treatments like Scotchgard can prevent stains from setting in, making spills easier to clean. You can also use area rugs or mats in high-traffic areas to reduce wear and tear on your carpet.

6. Establish a No-Shoes Policy

Shoes can track dirt, grime, and even harmful chemicals onto your carpet. Implementing a no-shoes policy in your home can significantly reduce stains and prolong your carpet’s lifespan. Provide guests with slippers or indoor shoes as an alternative.

7. Keep Pets and Kids in Mind

If you have pets or children, accidents are bound to happen. Train pets to stay off the carpeted areas, and use washable rugs in play areas. For pet-related stains, use enzymatic cleaners that break down organic messes effectively.

Contact Us for Expert Carpet Cleaning

Need help maintaining a spotless carpet? Our professional team is here to assist! We offer top-notch residential carpet cleaning services tailored to your needs. Contact us today for a free consultation or to schedule a cleaning session.

Conclusion

A stain-free carpet is achievable with regular care and attention. By following these seven tips, you can keep your carpets looking fresh and vibrant for years to come. Don’t forget to invest in professional services for a deeper clean and longer-lasting results.

FAQs About Carpet Cleaning

Q1: How often should I vacuum my carpet?

Vacuum high-traffic areas twice a week and less-used areas once a week for optimal cleanliness.

Q2: Can I clean my carpet myself instead of hiring professionals?

Yes, minor stains and regular vacuuming are manageable. However, professional ensures deep cleaning and extends your carpet’s life.

Q3: What’s the best way to remove pet stains from carpets?

Use an enzymatic cleaner specifically designed for pet stains. These products break down the organic matter effectively, removing both the stain and odor.

Q4: Is steam cleaning safe for all carpets?

Most carpets can handle steam cleaning, but always check the manufacturer’s guidelines or consult a professional to avoid damage.

Published on: January 28, 2025

The Importance of Professional Carpet Cleaning

In today’s world, the symbiotic relationship between cleanliness and good health has never been clearer. Professional carpet cleaning isn’t just about a pristine appearance; it’s a cornerstone of creating a healthier home environment. It’s a safeguard for your family’s well-being. Join us on an enlightening journey through the manifold benefits of professional carpet cleaning, ensuring that your home in Sydney becomes a sanctuary of health and hygiene.

Carpet Cleaning Sydney offers top-tier services for your home’s cleanliness needs, ensuring that the benefits listed below are within your reach:

1. Eliminating Allergens and Bacteria

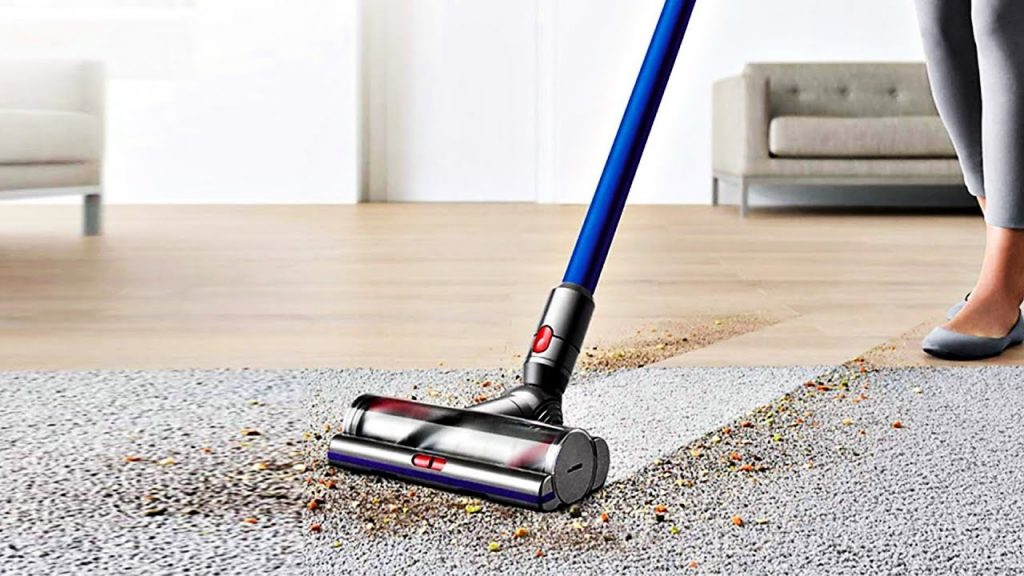
Your carpets often serve as an unwitting breeding ground for allergens and bacteria. Dust mites, pet dander, and an assortment of pollutants take up residence deep within the carpet fibres, serving as potent triggers for allergies and other health issues. Professional carpet cleaning transcends the mere removal of visible dirt; it delves into the core of the issue by targeting these concealed contaminants. This meticulous approach transforms your home into a healthier environment, a boon for those with respiratory conditions and sensitivities.

2. Extending the Lifespan of Your Carpets

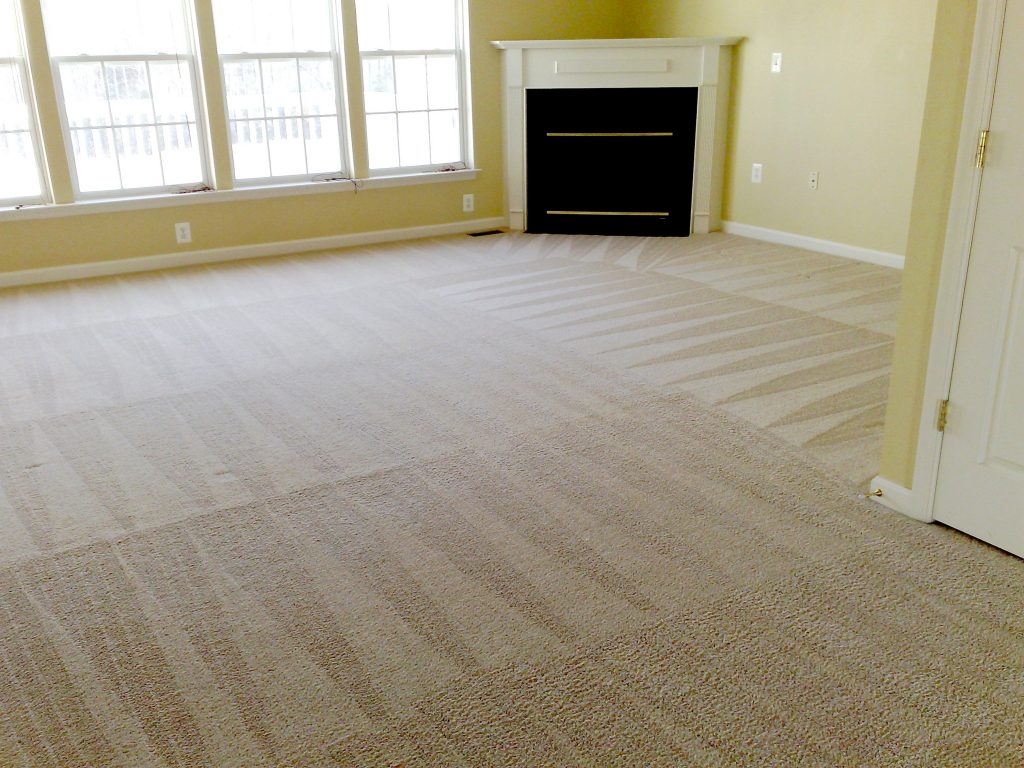
Carpeting is a substantial investment in your home’s interior. Regular professional cleaning offers far more than a cosmetic touch-up; it extends the very lifespan of your carpets. By eradicating the dirt and grime that can accelerate wear and tear, professional cleaning ensures that your carpets remain in pristine condition for years to come. This not only preserves the aesthetic value of your space but also translates into tangible cost savings by delaying the inevitable need for costly carpet replacements.

3. Enhancing Air Quality

Clean carpets actively contribute to superior indoor air quality. When your carpets are purged of dust and contaminants, the air you breathe in your home becomes cleaner and safer. This is of paramount significance in households with young children, the elderly, or individuals prone to allergies. Breathing in cleaner air is not only conducive to better health but also bolsters overall well-being.

4. Removing Stubborn Stains

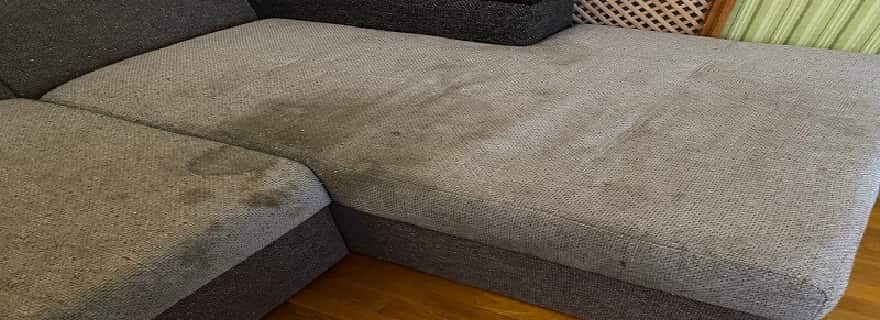
Life happens, and stains on your carpet are an unfortunate reality. Whether it’s a red wine spill from a dinner party or a pet mishap, these unsightly blemishes can mar the appeal of your space. However, professional carpet cleaners are armed with the expertise and specialized tools required to tackle even the most stubborn stains. Their adeptness in stain removal not only restores your carpet’s appearance but also contributes significantly to a healthier and more visually pleasing ambience.

5. Quick Drying for Unparalleled Convenience

Professional carpet cleaning services leverage advanced technology to ensure that your carpets dry swiftly and efficiently. This quick drying not only saves you time but also serves as a barrier against the growth of mould and mildew, which thrive in damp environments. The combination of thorough cleaning and rapid drying ensures that your home remains a haven of health and freshness.

6. Eco-Friendly Cleaning

Many professional carpet cleaning companies have embraced the shift towards eco-friendly cleaning solutions. These environmentally conscious products are not only safe for your family and pets but also exhibit a profound commitment to preserving our planet. By opting for such services, you are not only promoting a healthier home but also demonstrating a commendable dedication to sustainability.

In summation, professional carpet cleaning transcends mere aesthetics; it is an indispensable component in the endeavour to maintain a wholesome and comfortable home. By eradicating allergens, extending the life of your carpets, enhancing air quality, banishing stubborn stains, ensuring rapid drying, and embracing eco-friendly cleaning, you are unequivocally taking substantial strides towards creating a healthier living environment for yourself and your cherished family members.

Published on: September 25, 2023